
Ring size chart is essential. Whether you’re buying an engagement ring, a gift for a loved one, or a treat for yourself, getting the right ring size is make-or-break. A ring that’s too tight feels uncomfortable (and can even cut off circulation), while one that’s too loose risks slipping off and getting lost. The global jewelry market size was estimated at USD 366.79 billion in 2024 and is projected to reach USD 578.45 billion by 2033, growing at a CAGR of 5.3%. That’s where a ring size chart comes in—it’s your roadmap to precise sizing, no guesswork required. This guide will teach you how to read a ring size chart, measure your finger correctly, and navigate international sizing differences, so you can buy (or gift) a ring with confidence.

What Is a Ring Size Chart?
A ring size chart is a reference tool that correlates finger circumference (or diameter) to a standardized size—typically numbered (US/Canada), lettered (UK/Australia), or numbered with metric measurements (EU/Asia). It eliminates the guesswork of sizing by translating physical finger measurements into a label jewelers and retailers recognize. To use one effectively, you first need to understand its key components and why accuracy matters.
Key Components of a Standard Ring Size Chart
Most ring size charts include three critical pieces of information—learn to read them, and you’ll avoid sizing mishaps:
-
Size Label: The standardized code for the size (e.g., US Size 7, UK Size N, EU Size 54).
-
Finger Circumference: The distance around your finger (measured in millimeters or inches)—this is the most accurate measurement for sizing.
-
Finger Diameter: The width of your finger (measured in millimeters)—used less frequently, but helpful if you have a ring that already fits (you can measure its inner diameter).
Below is a simplified version of a US/Canada ring size chart (the most common standard in North America) to illustrate:
![Free Ring Sizer [+Chart] & Try On Online: How to Check Ring Size](https://bcw-media.s3.ap-northeast-1.amazonaws.com/strapi/assets/ring_size_chart_7435f2d25b.jpg)
|
US Size |
Finger Circumference (mm) |
Finger Circumference (in) |
Finger Diameter (mm) |
|
4 |
46.5 |
1.83 |
14.8 |
|
5 |
49.3 |
1.94 |
15.7 |
|
6 |
52.2 |
2.05 |
16.6 |
|
7 |
54.9 |
2.16 |
17.5 |
|
8 |
57.8 |
2.28 |
18.4 |
|
9 |
60.7 |
2.39 |
19.3 |
|
10 |
63.5 |
2.50 |
20.2 |
Pro Tip: Always prioritize circumference over diameter—fingers are round, so measuring the distance around them is more accurate than the width.
Why You Need a Ring Size Chart (And Common Mistakes to Avoid)
A ring size chart isn’t just a "nice-to-have"—it’s a tool that prevents costly, disappointing mistakes. Here’s why it’s essential, and what to watch out for:
The Risks of Guessing Sizes
-
Returns & Wasted Money: 42% of online ring purchases are returned due to sizing errors, per 2024 retail data. Resizing can cost \(20–\)100 (or more for platinum/gemstone rings), and some designs (like eternity bands) can’t be resized at all.
-
Ruined Moments: Imagine proposing with a ring that’s too small to slip on, or gifting a birthday ring that falls off during the celebration—sizing mishaps turn joyous occasions into stressors.
-
Discomfort: A too-tight ring can leave indentations, cause swelling, or even restrict blood flow (especially in hot weather). A too-loose one may get caught on clothing or lost.
Common Sizing Mistakes (And How a Chart Fixes Them)
-
Using String or Paper: These materials stretch or tear easily, leading to inaccurate measurements. A chart paired with a flexible measuring tape (or jeweler’s sizer) is far more reliable.
-
Measuring Cold Fingers: Fingers shrink in cold weather (up to half a size!) and swell in heat, exercise, or after eating. A chart helps you adjust for these changes (more on that later).
-
Ignoring International Sizes: If you buy a ring from a UK retailer but use a US chart, you’ll end up with the wrong size (e.g., US Size 7 = UK Size N, not UK Size 7). A chart that includes multiple standards eliminates confusion.

How to Use a Ring Size Chart: Step-by-Step Guide
Using a ring size chart is simple—if you follow these steps to get an accurate measurement first. We’ll cover at-home methods (no jeweler required) and professional sizing (for high-value rings like engagement bands).
Step 1: Gather the Right Tools
You don’t need fancy equipment—just one of these:
-
Flexible Measuring Tape: The best at-home tool (look for one marked in millimeters, as most charts use metric units).
-
Jeweler’s Ring Sizer: A plastic or metal strip with pre-sized rings (available for \(5–\)10 online or at craft stores)—the most accurate at-home option.
-
Printable Ring Size Chart: Many jewelers (like Tiffany, James Allen) offer free printable charts—just ensure your printer is set to "100% scale" (no zooming!) to avoid distortion.
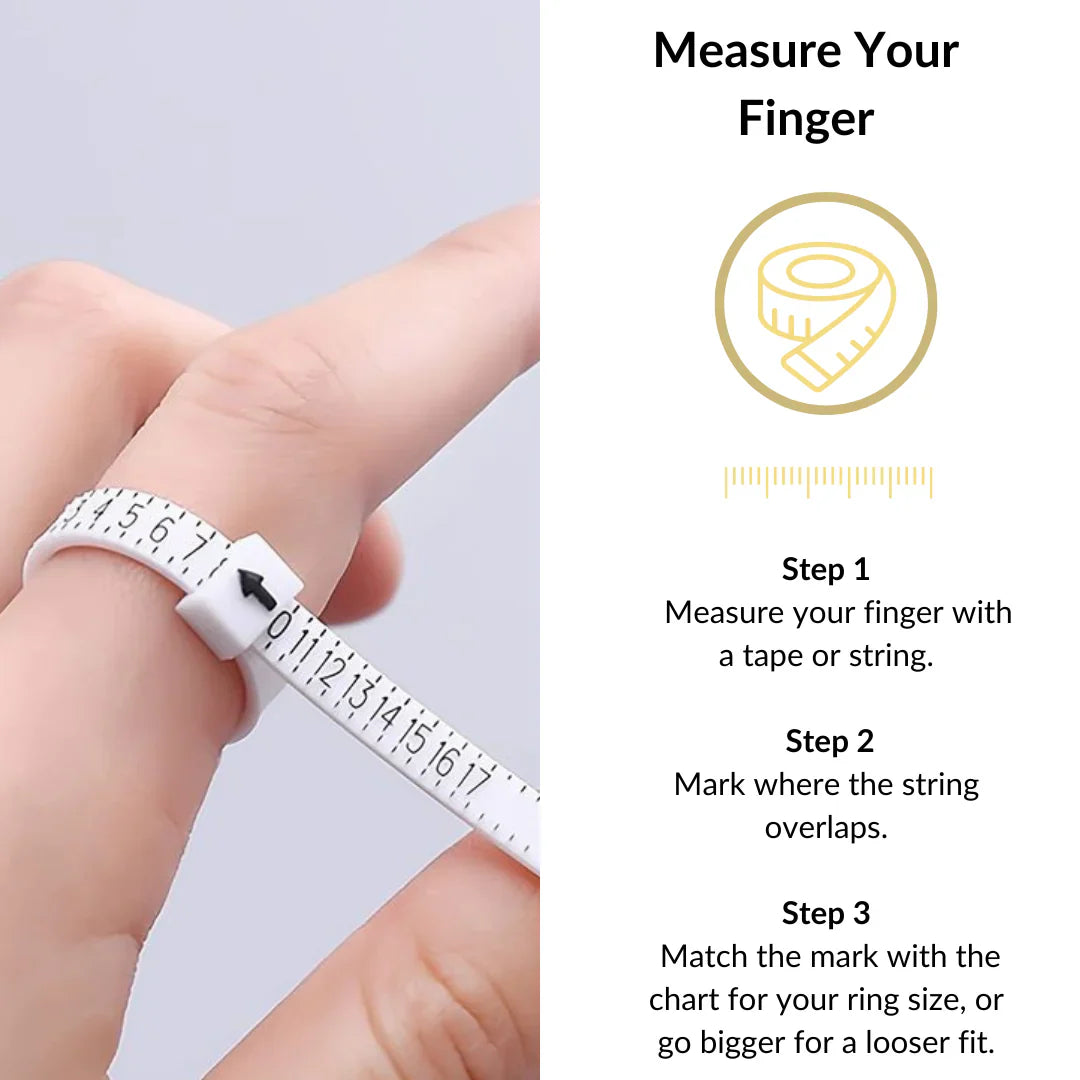
Step 2: Measure Your Finger Correctly
Timing and technique matter—follow these rules for accuracy:
-
Measure at the Right Time: Do it in the afternoon or evening—fingers are smallest in the morning and swell throughout the day. Avoid measuring after working out, showering, or eating a salty meal (all cause swelling).
-
Measure the Right Finger: If the ring is for your engagement or wedding, measure the ring finger of your left hand (most people wear rings here). For other rings, measure the finger you plan to wear it on (index fingers are usually 1–2 sizes larger than ring fingers).
-
Take Multiple Measurements: Measure 2–3 times to ensure consistency. If results vary, use the larger size (it’s better to have a slightly loose ring than a tight one).

Method 1: Flexible Measuring Tape
-
Wrap the measuring tape around the base of your finger (where the ring will sit—this is the widest part for most people).
-
Pull it snug, but not tight—you should be able to slide a finger between the tape and your skin.
-
Note the circumference in millimeters (e.g., 54.9mm).
-
Match this number to the "Finger Circumference (mm)" column on your ring size chart—this gives you your size (e.g., 54.9mm = US Size 7).
Method 2: Jeweler’s Ring Sizer
-
Slide the sizer’s rings onto your finger one by one.
-
Stop at the ring that fits snugly but can still slide off with a little effort.
-
Read the size label on that ring (e.g., US 8) and cross-check it with a chart to confirm.
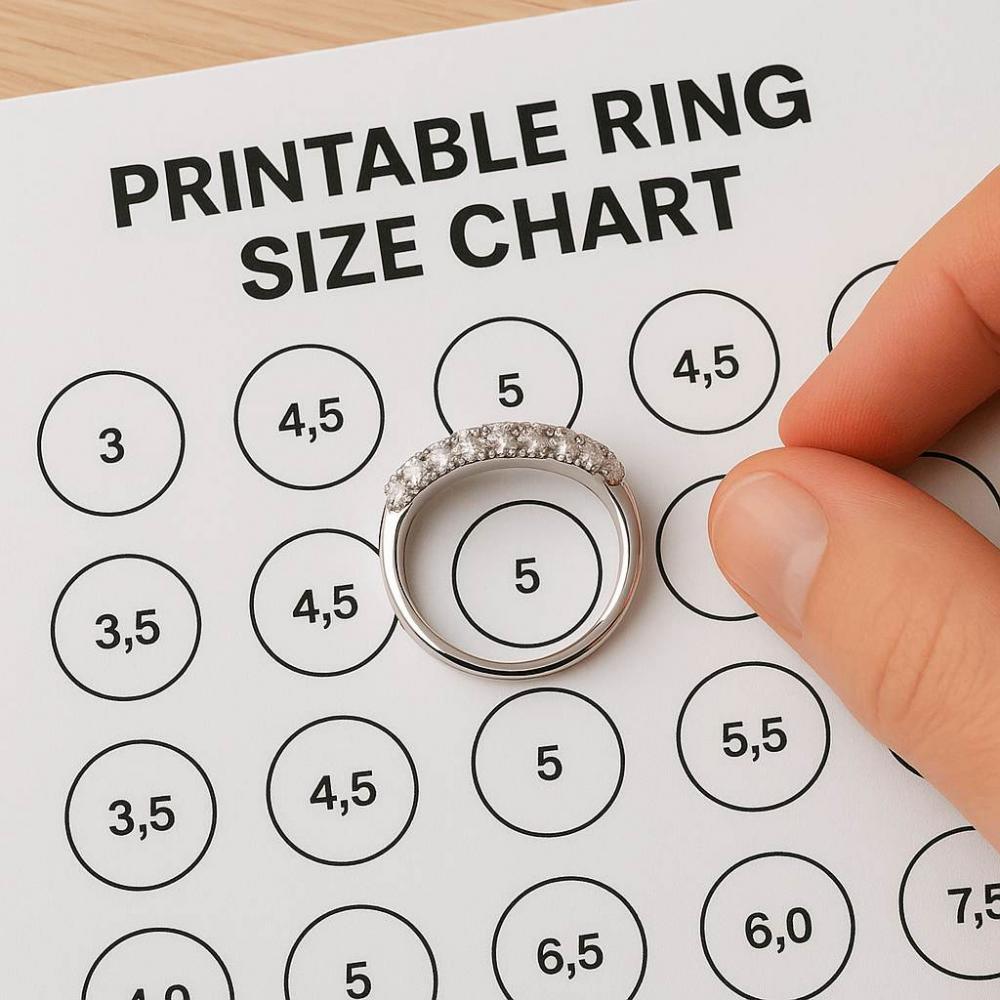
Method 3: Printable Ring Size Chart
-
Print the chart (100% scale—test by measuring the "validation line" on the chart to ensure it’s accurate).
-
Cut out the included "size strip" (a paper band with markings).
-
Wrap the strip around your finger, aligning the arrow with the size markings.
-
The number where the arrow overlaps is your size—match it to the chart.
Step 3: Adjust for Ring Type
Some rings fit differently than others—use the chart as a starting point, then adjust:
-
Wide Bands (6mm+): Add half a size (e.g., if your measurement says US 7, get US 7.5). Wide bands sit tighter than thin ones.
-
Eternity Bands (full of gemstones): Add half a size—they can’t be resized, so accuracy is critical.
-
Slip-On Styles (no prongs): Stick to your measured size—they’re more forgiving than structured bands.
International Ring Size Charts: How to Convert Sizes
If you’re buying a ring from a retailer outside your country, a size chart that includes international conversions is a must. Sizing standards vary widely—here’s a simplified conversion chart for the most common regions:
|
US/Canada Size |
UK/Australia Size |
EU Size |
Japan Size |
Finger Circumference (mm) |
|
4 |
F |
44 |
8 |
46.5 |
|
5 |
J |
49 |
10 |
49.3 |
|
6 |
L |
52 |
12 |
52.2 |
|
7 |
N |
54 |
14 |
54.9 |
|
8 |
P |
57 |
16 |
57.8 |
|
9 |
R |
60 |
18 |
60.7 |
|
10 |
T |
63 |
20 |
63.5 |
Common Conversion Mistakes:
-
Don’t assume "Size 7" is the same globally—US Size 7 = EU Size 54, not EU Size 7.
-
For online purchases, always ask the retailer to confirm the sizing standard (some use "Asian" vs. "EU" sizes, which differ slightly).
When to Get Professional Sizing (And Why It Matters)
At-home methods work for casual rings, but for high-value pieces (engagement rings, heirlooms), professional sizing is worth the trip to a jeweler. Here’s why:
Benefits of Professional Sizing
-
Precision: Jewelers use calibrated tools (like a metal mandrel—a cone-shaped rod marked with sizes) that measure down to 1/4 of a size, far more accurate than at-home tools.
-
Expert Advice: They’ll adjust for ring type (e.g., "This platinum band will fit tighter—let’s size up half a size") and finger shape (some fingers are wider at the base than the top).
-
Peace of Mind: For engagement rings, a jeweler can even help you "secretly" size your partner’s finger (e.g., by measuring a ring they already wear).
When to Book a Professional Sizing
-
You’re buying an engagement ring or wedding band.
-
The ring has gemstones, platinum, or intricate details (hard to resize).
-
Your at-home measurements are inconsistent (e.g., one day you’re US 7, the next US 7.5).
Tips to Maintain Accurate Sizing (Even as Fingers Change)
Fingers aren’t static—they change size due to weight fluctuations, age, pregnancy, or temperature. Here’s how to ensure your ring still fits:
-
Re-Measure Annually: If you wear a ring daily, check its fit once a year. Weight gain/loss of 10+ pounds can change your ring size by half a size or more.
-
Adjust for Pregnancy: Pregnant people often experience finger swelling—size up 1/2 to 1 size for temporary rings (avoid resizing heirlooms until after pregnancy).
-
Store Sizing Tools: Keep a jeweler’s sizer or printable chart at home—you’ll need it if you buy new rings or adjust existing ones.
-
Know When to Resize: If a ring leaves a red indent, feels tight when you wake up, or slips off easily, it’s time to resize. Most jewelers offer this service for \(20–\)100 (depending on metal).
Frequently Asked Questions About Ring Size Charts
Q1: My partner won’t let me measure their finger (it’s a surprise)—what do I do?
A: Borrow a ring they wear on the same finger (e.g., left ring finger) and measure its inner diameter with a ruler (in millimeters). Use the "Finger Diameter" column on a chart to find their size. If you can’t borrow a ring, ask their friend/sibling for help (e.g., "What size ring does [Name] wear? I’m buying them a gift!").
Q2: I measured my finger at 55mm—what size is that?
A: 55mm circumference = US Size 7 (check the chart above!). If you’re buying a wide band (6mm+), size up to US 7.5.
Q3: Are men’s and women’s ring size charts different?
A: No—sizing is unisex! Men’s fingers are typically larger (most wear US 8–12), while women’s are smaller (most wear US 4–8), but the chart uses the same measurements for everyone.
Q4: Can I use a ring size chart for children?
A: Yes—but children’s fingers grow quickly! Use a flexible measuring tape, and size up 1/2 to 1 size (e.g., if they measure US 4, get US 4.5) to account for growth. Avoid resizing expensive rings—opt for adjustable styles instead.
Q5: My ring size chart printout looks too small—what’s wrong?
A: Your printer is probably set to "fit to page" (which shrinks the chart). Go to printer settings, select "100% scale" or "actual size," and print again. Test by measuring the "validation line" on the chart (it should be exactly 50mm long).
Conclusion: Size With Confidence, Wear With Joy
A ring size chart is the unsung hero of successful ring shopping—it turns guesswork into certainty, and ensures your ring fits as perfectly as the moment you give or receive it. Whether you’re measuring at home for a casual ring or visiting a jeweler for an engagement band, following this guide will help you avoid mistakes, save money on returns, and wear your ring with comfort and pride.
Next time you shop for a ring, keep this chart handy, measure at the right time, and don’t hesitate to ask for help. After all, a ring that fits well isn’t just jewelry—it’s a daily reminder of love, celebration, or self-care.
Here’s to perfectly fitting rings—and the moments they make.